Landscaping O'Fallon IL Professionals
Our team of experienced landscape designers and contractors specialize in creating beautiful outdoor spaces that not only add curb appeal but also drive up the value of your home. We strive to transform your yard into an extension of your indoor living space, improving your overall outdoor living experience.
One of our key services is water garden design. We collaborate with you to create a water garden that reflects your style, complements your home, and thrives in O'Fallon's climate. Whether you desire a tranquil oasis or a vibrant flower garden, our experts can bring your vision to life.
Easy Financing For Your Outdoor Landscaping
Outdoor Edge Landscaping LLC has financing options for all your outdoor landscaping to help your backyard dreams come true:
HFS Financial
- 100% Personal Loans
- Every $10k as low as $89/month
- Fixed Rates
- Terms up to 20 Years
- Fund ANY Project within 48 hours
- Loans up to $400,000
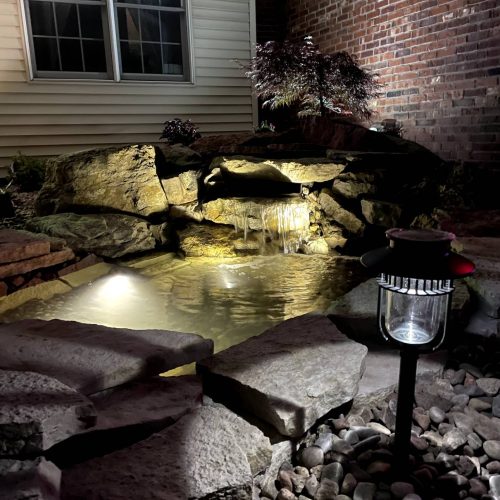
Landscaping O'Fallon IL Experts Can Design A Waterfall Feature
Designing a waterfall feature in a landscaping O’Fallon IL project is a multi-step process that requires careful planning and execution. Here’s a general overview of how Outdoor Edge Landscaping would approach this task:
- Site Assessment: The first step involves assessing the site where the waterfall feature will be located. This includes evaluating the existing landscape, soil type, available space, sun exposure, and proximity to trees or buildings. This step helps in deciding the best location for the waterfall.
- Conceptualization: Once the site has been chosen, we begin conceptualizing the design. This involves deciding the size, shape, and style of the waterfall. Some homeowners prefer a natural-looking waterfall that blends with the existing landscape, while others might want a more modern, geometric design. We also consider how the waterfall will integrate with other elements like ponds, streams, or plants.
- Material Selection: The next step is to choose materials that will be used to construct the waterfall. This could range from natural stones like granite and slate to man-made materials like concrete and glass. The choice of material often depends on the desired aesthetic and budget.
- Construction Planning: Before construction begins, we create a detailed plan that outlines the steps required to build the waterfall. This includes marking out the area, preparing the site, and determining the placement of pumps and plumbing.
- Building the Waterfall: The construction phase begins with excavating the site and installing a liner to prevent water loss. The water pump and filtration system are then installed. Stones and rocks are strategically placed to create the waterfall structure. The water path is carefully crafted to ensure the water flows smoothly and creates the desired sound.
- Adding Finishing Touches: Once the waterfall is functioning correctly, we add finishing touches like plants and lighting to enhance the look of the waterfall. Plants can help the waterfall blend into the landscape, while lighting can create stunning visual effects, especially at night.
- Testing and Maintenance: Finally, we run the waterfall to test its functionality. After it’s working to satisfaction, we provide the homeowner with maintenance tips to keep the waterfall running smoothly.
Designing a waterfall is an intricate process that requires professional expertise. Outdoor Edge Landscaping has the skills and experience to create a stunning waterfall feature that enhances your outdoor space and brings a sense of tranquility to your landscaping O’Fallon IL project.
At Outdoor Edge Landscaping, we aim to provide quality services that satisfy our customers. We cater to both commercial and residential clients, offering tailored solutions to meet each client’s unique needs.
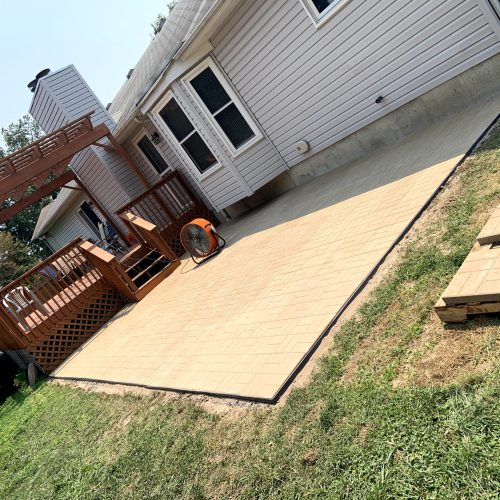
Brick Paver Patio Ideas in O’Fallon IL
Outdoor Edge Landscaping can help bring your ideas to life. With expertise in both hard and soft landscaping, we can assist with everything from patio installation to plant selection. Whether you’re envisioning a tranquil oasis or a lively entertainment space, our team can make it happen.
Designing a brick paver patio in a landscaping project involves several key steps. Here’s how the process typically unfolds:
- Planning: The first step is to sketch out your design, considering the shape and size of the patio, as well as its placement in relation to your home and landscape.
- Preparation: Next, you need to excavate the area for your patio. This usually involves digging down about 8 inches, plus the thickness of the brick or paver.
- Setting the Base: After excavation, you need to create a strong base for your patio. This involves laying down a layer of compacted gravel, topped by a layer of sand.
- Laying the Pavers: You can then start to lay your brick pavers, following the pattern you’ve chosen. It’s crucial to ensure that the rows are straight and level as you go.
- Securing the Patio: Once all the pavers are laid, you’ll need to secure them. This often involves packing dirt or sand around the perimeter and spreading sand over the top to lock the bricks in place.
Upon completion, the real fun begins: furnishing your new brick paver patio. From installing a fire pit for cozy evenings to setting up a dining area for outdoor meals, the possibilities are endless. You might consider adding an outdoor rug for comfort underfoot, or installing a pergola for some shade. Planters filled with colorful flowers or lush greenery can also add a touch of nature and enhance the overall aesthetic.
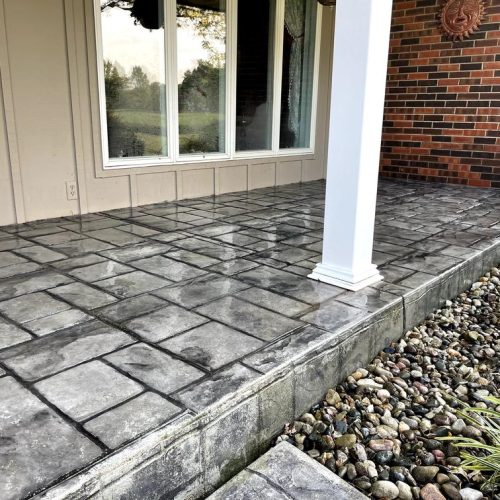
Stamped Concrete Ideas in O’Fallon IL
Designing and building a stamped concrete landscaping O’Fallon IL project is a detailed process that involves careful planning and execution.
Stamped concrete is an innovative and versatile paving technique that has gained popularity in recent years due to its ability to mimic the aesthetics of materials such as brick, stone, tile, or even wood. This is achieved by adding color, pattern, and texture to the concrete, offering you a wealth of design possibilities for your outdoor spaces.
Aesthetically, stamped concrete can add significant curb appeal to your property. With a wide array of patterns and colors available, you can create a design that complements your home and landscape. Whether you’re looking to install a new driveway, patio, or walkway, stamped concrete can elevate the look of these areas.
Here’s a step-by-step guide based on the search results:
- Site Preparation: This involves marking out the area for the concrete slab, excavating it to the required depth, and preparing a solid foundation. The ground should be compacted and leveled, and a sub-base of gravel laid if necessary.
- Forming: Wooden forms are set up to outline the shape of the slab. The forms hold the concrete in place while it sets and help define the final shape of the project.
- Mixing and Pouring the Concrete: The concrete mixture is prepared, ensuring it has the right consistency. It’s then poured into the prepared forms.
- Screeding and Finishing: The concrete is spread evenly within the form using a screed, creating a smooth surface. It’s then finished to the desired level of smoothness.
- Coloring: A color hardener is applied to the surface of the concrete if desired. This gives the concrete its color and can be chosen to match or complement the surrounding landscape.
- Stamping: Rubber stamps or texturizing mats are used to imprint a pattern into the wet cement. This process replicates the look of different materials, such as brick, stone, or wood.
- Curing: The concrete is allowed to cure for a period of time to gain strength. This usually takes several days.
- Sealing: Finally, a protective sealer is applied to protect the stamped concrete from weather damage and enhance its color.
Once your stamped concrete project is completed, it opens up a wealth of opportunities for furnishing your outdoor living space. You could add a dining set for alfresco meals, comfortable seating for lounging, or even a fire pit for cozy gatherings. Potted plants or garden sculptures can add greenery and interest, while outdoor lighting can create a warm and inviting ambiance.
Outdoor Edge Landscaping can bring these ideas to life. With our experience in landscape design and installation, we can help you choose the right furnishings to complement your stamped concrete area and create an outdoor space that reflects your style and meets your needs.


